ART 262- This is for our final.
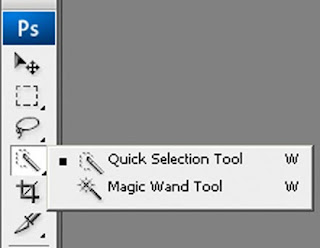
3. To change the brush tip size, click the Brush pop-up menu in the options bar, and type in a pixel size or drag the slider. Use the Size pop‑up menu options to make the brush tip size sensitive to pen pressure or a stylus wheel. When creating a selection, press the right bracket (]) to increase the Quick Selection tool brush tip size; press the left bracket ([) to decrease the brush tip size.
4. Choose Quick Selection options. Sample All Layers Creates a selection based on all layers instead of just the currently selected layer.
Au
to-Enhance Reduces roughness and blockiness in the selection boundary. Auto-Enhance automatically flows the selection further toward image edges and applies some of the edge refinement you can apply manually in the Refine Edge dialog with the Contrast and Radius options.
5. Paint inside the part of the image you want to select. The selection grows as you paint. If updating is slow, continue to drag to allow time to complete work on the selection. As you paint near the edges of a shape, the selection area extends to follow the contours of the shape edge.
If you stop dragging and then click or drag in a nearby area, the selection will grow to include the new area.
◦ To subtract from a selection, click the Subtract from option in the options bar, then drag over the existing selection.
◦ To temporarily switch between add and subtract modes, hold down the Alt (Windows) or Option (Mac) key.
◦ To change the tool cursor, choose Edit > Preferences > Cursors > Painting Cursors (Windows) or Photoshop > Preferences > Cursors > Painting Cursors (Mac OS). Normal Brush Tip displays the standard Quick Selection cursor with a plus or minus sign to show the selection mode.
No comments:
Post a Comment